OSS 版 LWC でWebApp
LWC というと、Salesforce の Lightning Web Component が真っ先に浮かぶ人は、Salesforce 界隈の人だと思う。
で、Salesforce プラットフォーム上のフレームワークとして有名ではあるのだけど、実際にはこいつは Opensource としても使える。
因みにこの記事執筆当時の nodejs のバージョンは
$ node --version
v14.17.1
$ npm --version
7.17.0
始め方
と言ってもそんなに難しい話ではない。
nodejs が入ってるなら、大体このコマンドで行ける。
$ npx create-lwc-app account-book
するとインストールウィザードが起動する
⚡⚡⚡⚡⚡  Lightning Web Components  ⚡⚡⚡⚡⚡


? Do you want to use the simple setup? Yes
? Package name for npm account-book
? Select the type of app you want to create (Use arrow keys)
> Standard web app
  Progressive Web App (PWA)
  Electron app
当然標準 WebApp を選択
? Do you want a basic Express API server? (y/N) y
express API サーバは、バックエンドで動作させるWebサーバの事。
https://white-azalea.hatenablog.jp/entry/2021/07/14/220816
で、作成したひな型がこんな感じ

開発サーバを起動
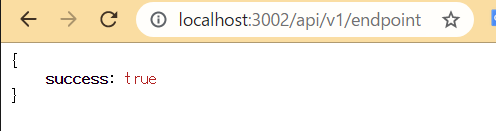
$ npm run watch と叩くと、開発用のWebサーバ (LWC用)が 3001 ポートで、API サーバが 3002 ポートで起動する。
Web サーバ(ポート 3001)にアクセスして存在しないリクエストならAPIサーバにルーティングされるよう設定されているので、API サーバの方のソース(src/api.js)で以下の様に書かれているなら
// Simple Express server setup to serve for local testing/dev API server
const compression = require('compression');
const helmet = require('helmet');
const express = require('express');

const app = express();
app.use(helmet());
app.use(compression());

const HOST = process.env.API_HOST || 'localhost';
const PORT = process.env.API_PORT || 3002;

app.get('/api/v1/endpoint', (req, res) => {
    res.json({ success: true });
});

app.listen(PORT, () =>
    console.log(
        `✅  API Server started: http://${HOST}:${PORT}/api/v1/endpoint`
    )
);
ポート 3002 はもちろん
ポート 3001 でも
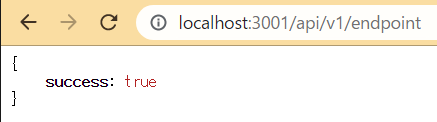
とできる。
JSON サーバに仕立てよう
src/server/api.js の定義では、標準では application/x-www-form-urulencoded で送受信っすることを期待している。
そこで、サーバ設定で、基本的に application/json つまり、JSON 値を受け取る前提に変更する。
何のことはない app.use(express.json()); を追加するだけだ。
const app = express();
app.use(helmet());
app.use(compression());
app.use(express.json());  // この行追加
そうすると受け取った値は JSON パースが試みられて、実装もこんな感じで書ける。
app.post('/api/test', (req, res) => {
  let jsonBody = req.body;
  console.log(jsonBody);
  res.status(200).json(jsonBody);
});
SQLITE3 等のデータベースを用意しよう
幸い、sqlite3 のパッケージがあるので npm i -S sqlite3 でインストール。
使ってる図はこんな感じで、

DBCommon.js で sqlite をセットアップ
const sqlite3 = require("sqlite3")

let database

class DBCommon {
  static init() {
    database = new sqlite3.Database("data.sqlite3")
  }
  static get() {
    return database
  }
}

DBCommon.init();
exports.DBCommon = DBCommon;
brands.js がテーブル定義など。
const common = require("./DBCommon")
const TABLE_NAME = 'brand';

const DBCommon = common.DBCommon;

function createTable() {  // テーブルが無ければ作る処理
  const db = DBCommon.get();
  return new Promise((resolve, reject) => {
    try {
      db.serialize(() => {
        db.run(`create table if not exists ${TABLE_NAME} (
          id integer primary key AUTOINCREMENT,
          name text not null unique,
          description text default null
        )`)
      });
      return resolve()
    } catch (error) {
      return reject(error);
    }
  });
}
createTable();

class Brand {  // js に型はいう程意味ないけど、気分かな
  constructor(id, name, description) {
    this.id = id;
    this.name = name;
    this.description = description;
  }
}

class BrandTable {

  /**
   * @param {Brand} brand
   */
  static async insert(brand) {
    return new Promise((resolve, reject) => {
      const db = DBCommon.get();
      try {
        db.run(
          `insert into ${TABLE_NAME} (name, description) values ($name, $description)`,
          brand.name, brand.description
        )
        return resolve()
      } catch (error) {
        return reject(error)
      }
    });
  }

  static async selectAll() {
    return new Promise((resolve, reject) => {
      const db = DBCommon.get();
      try {
        const result = [];
        db.serialize(() => {
          db.all(
            `select id, name, description from ${TABLE_NAME} order by id`,
            (err, res) => {
              if (err) return reject(err);
              if (!res) return resolve([]);
              res.forEach(row => {
                result.push(new Brand(row['id'], row['name'], row['description']))
              });
              return resolve(result);
            }
          )
        })
      } catch (error) {
        reject(error);
      }
    })
  }
}

exports.Brand = Brand;
exports.BrandTable = BrandTable;
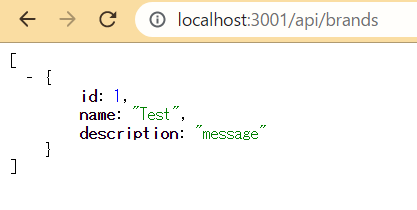
ここで、 src/server/api.js でこんな関数を追加する
const brands = require('./database/brands');
const BrandTable = brands.BrandTable;

app.get('/api/brands', async (req, res) => {
  try {
    res.json(await BrandTable.selectAll());
  } catch (error) {
    res.status(500).json({ success: false, message: error});
  }
});

app.post('/api/brands', async (req, res) => {
  try {
    await BrandTable.insert(req.body);
    res.json({ success: true });
  } catch (error) {
    res.json({ success: false, message: 'Has error!' });
  }
});
すると
LWC の作り方
ざっくり全体像
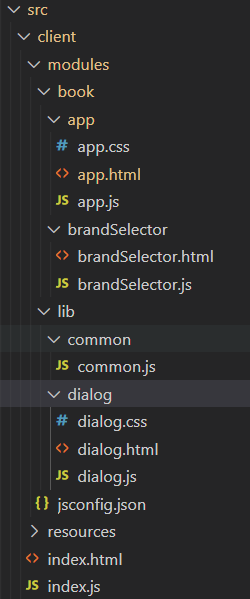
LWC は原則的に src/client/modules の下に 2 階層以上ディレクトリ掘って、css, js, html の3点セットを置けばいい。
とはいえとりあえずは共通機能を用意する。

共通スタイル(Bootstrap)を読み込むコントローラ、Ajax コマンド用ツール、JSON API のエンドポイント設定を定義しとく
import { LightningElement } from 'lwc';

export default class CssCommonElement extends LightningElement {
    _bootStrapCss() {
        let _bootstrap = 'https://cdn.jsdelivr.net/npm/bootstrap@5.0.0-beta1/dist/css/bootstrap.min.css';
        const styles = document.createElement('link');
        styles.href = _bootstrap;
        styles.crossorigin = 'anonymous';
        styles.rel = 'stylesheet';
        return styles;
    }

    connectedCallback() {
        this.template.appendChild(this._bootStrapCss());
    }
}

export class Ajax {
  /**
   * get as promise
   * @param {string} url
   * @returns {Promise}
   */
  static get(url) {
    return new Promise((resolve, reject) => {
      const req = new XMLHttpRequest();
      req.open('GET', url, true);
      req.onload = () => {
        if (req.status >= 200 && req.status < 300) {
          resolve(JSON.parse(req.responseText));
        } else {
          console.log(`Error ocurred ${req.status} : ${req.responseText}`);
          reject(new Error(req.statusText));
        }
      };
      req.onerror = () => {
        reject(new Error(req.statusText))
      };
      req.send();
    });
  }
}

export class Endpoints {
  static GET_ALL_BRANDS = '/api/brands';
}
で、app.js
import CssCommonElement from '../../lib/common/common';

export default class App extends CssCommonElement {}
app.html を次の様に設定します
<template>
  <div class="container-fluid">
    <div class="row">
      <div class="col-md-4">
        <button class="btn btn-primary">Add new brand</button>
      </div>
      <div class="col-md-8 test">Right component</div>
    </div>
  </div>
</template>
ここまで書けば、index.js を修正します。
import { createElement } from 'lwc';
import EntryApp from 'book/app';

const app = createElement('account-book', { is: EntryApp });
// eslint-disable-next-line @lwc/lwc/no-document-query
document.querySelector('#main').appendChild(app);
見ての通り、modules 以下はそのまま呼び出してます。
これでアクセスすると

ここで、追加のコンポーネントを定義します
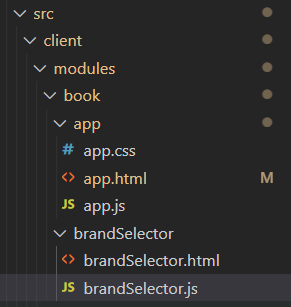
book/brandSelector/brandSelector.html
<template>
  <template if:true={isLoading}>
    <h1>読込中</h1>
  </template>
  <template if:false={isLoading}>
    <template if:true={hasError}><h1>{errorMessage}</h1></template>
    <template if:false={hasError}>
      <div class="list-group">
        <template for:each={allBrands} for:item="brand" for:index="idx">
          <template if:true={brand.isSelected}>
            <a href="#" class="list-group-item list-group-item-action active" key={brand.id} title={brand.description} onclick={onSelect} data-id={brand.id}>{brand.name}</a>
          </template>
          <template if:false={brand.isSelected}>
            <a href="#" class="list-group-item list-group-item-action" key={brand.id} title={brand.description} onclick={onSelect} data-id={brand.id}>{brand.name}</a>
          </template>
        </template>
      </div>
    </template>
  </template>
</template>
book/brandSelector/brandSelector.js
import CssCommonElement, { Ajax, Endpoints } from '../../lib/common/common';
import { track } from 'lwc';

export default class BrandSelector extends CssCommonElement {
  @track allBrands;
  @track hasError;
  @track errorMessage;
  @track isLoading;

  constructor() {
    super();
    this.allBrands = [];
    this.hasError = false;
    this.errorMessage = '';
    this.isLoading = true;
    this.loadBrands();
  }

  async loadBrands() {
    try {
      let brands = await Ajax.get(Endpoints.GET_ALL_BRANDS);
      brands.forEach(v => { v.isSelected = false; });
      this.allBrands = brands;
      this.isLoading = false;
    } catch (error) {
      this.hasError = true;
      this.errorMessage = '銘柄の読み込みに失敗しました。画面をリロードしてください。';
      this.isLoading = false;
    }
  }

  onSelect(event) {
    let target = event.path[0];
    let id = target.getAttribute('data-id');
    this.allBrands.forEach(v => {
      v.isSelected = v.id == id;
    });
    this.dispatchEvent(new CustomEvent('select', { detail: id }));
  }
}
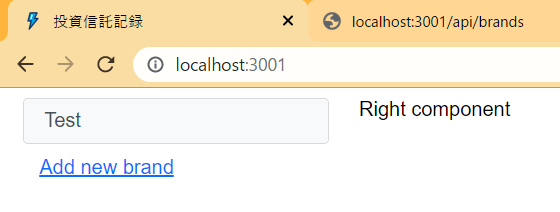
で app,html から呼び出してみます。
<book-brand-selector ></book-brand-selector>
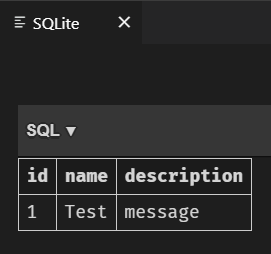
SQLite の中身はこんな感じ。
ということで今日はこの辺まで